Creating a purchase order
This guide explains how to create a purchase order in the Merchant App, including selecting a vendor, adding items (products/raw materials/custom materials), applying GST and charges, and recording payment details.
Prerequisites
- You are logged into the Merchant App with a role that has Edit access to Purchases.
- Vendors and most products/raw materials are already created in the system. (Refer Create a vendor)
Step 1: Open the Purchase Order screen
- From the main dashboard, Go to Purchases → Orders.
- Click
 button to open a new purchase order screen.
Step 2: Select vendor and order details
- Select Vendor: Choose the vendor from the vendor dropdown list.
- Order status: Select the initial status, for example Open, Transit, or Received.
- Order date: Set the purchase order date (defaults to today; change if needed).
Step 3: Set payment details
-
Payment type
- Select one of:
- Full payment – entire amount will be paid now.
- Credit – no payment now; amount will remain payable.
- Partially paid – only part of the amount is paid now.
- Select one of:
-
Payment mode
- If you are recording a payment (Full or Partially paid), select the Payment mode:
- Cash
- UPI
- Card
- Cheque
- Others
- Enter the Paid amount as required.
- If you are recording a payment (Full or Partially paid), select the Payment mode:
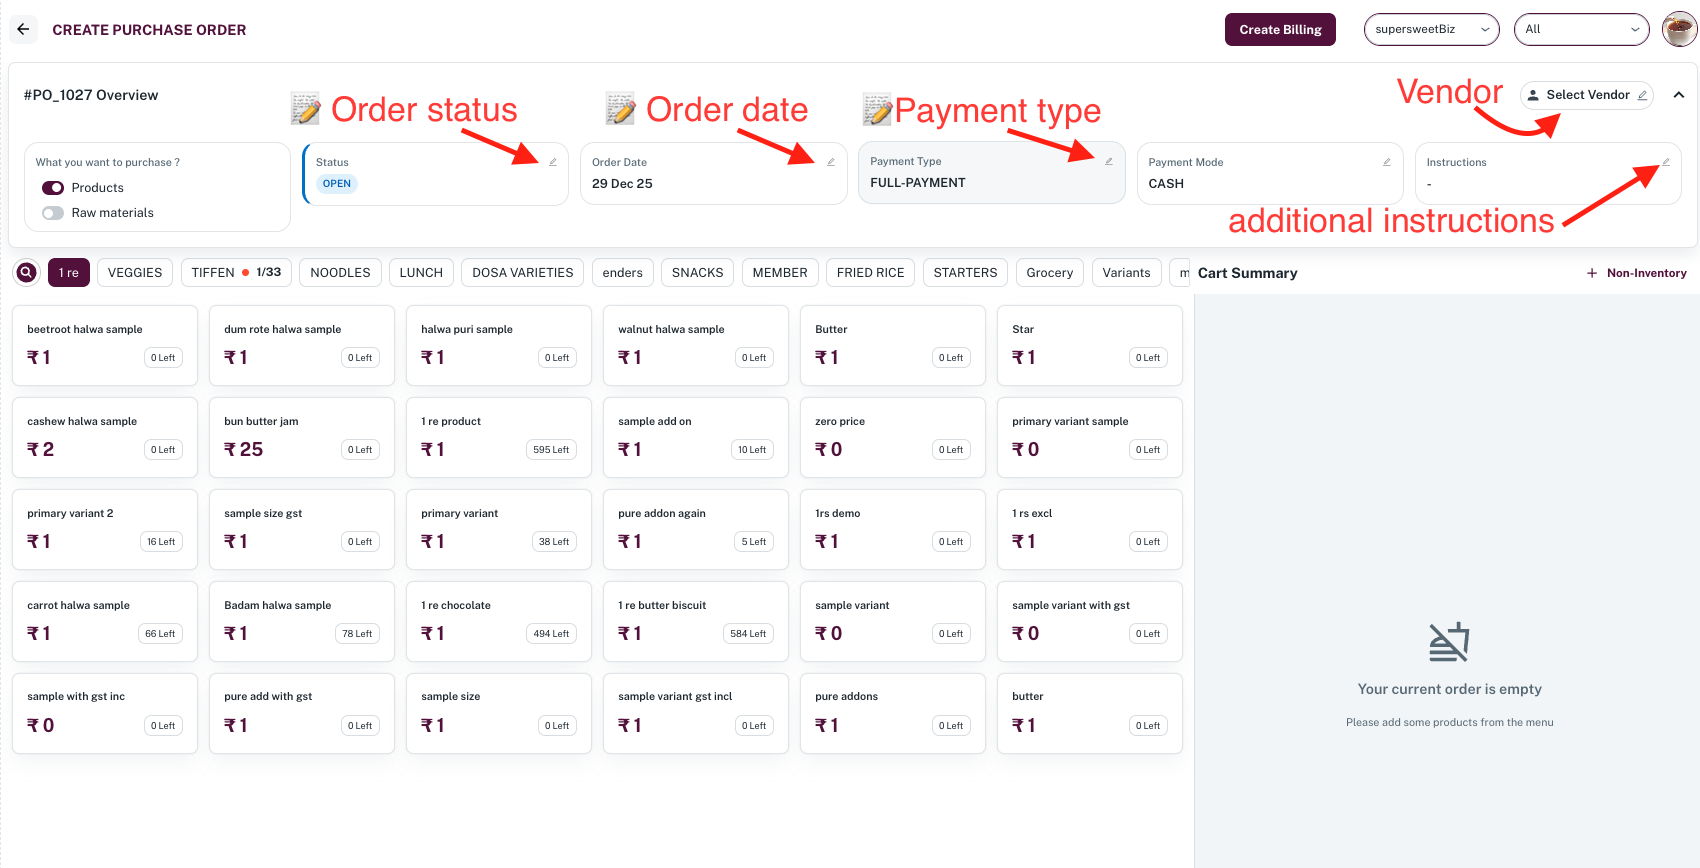
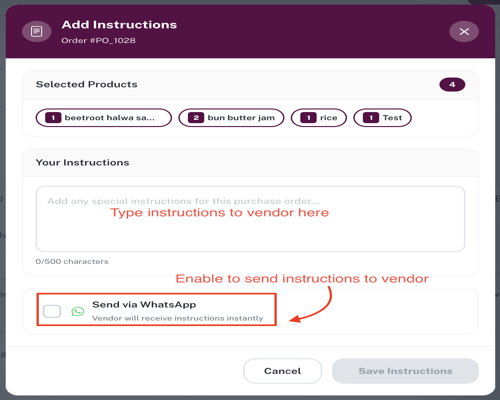
Step 4: Add additional instructions (optional)
- In the Additional instructions box, enter any special instructions for the vendor (for example, “Deliver before 6 PM”, “Use refrigerated vehicle”).
- (Optional) For sending instructions via WhatsApp, enable Send via WhatsApp.
Step 5: Add items to the purchase order
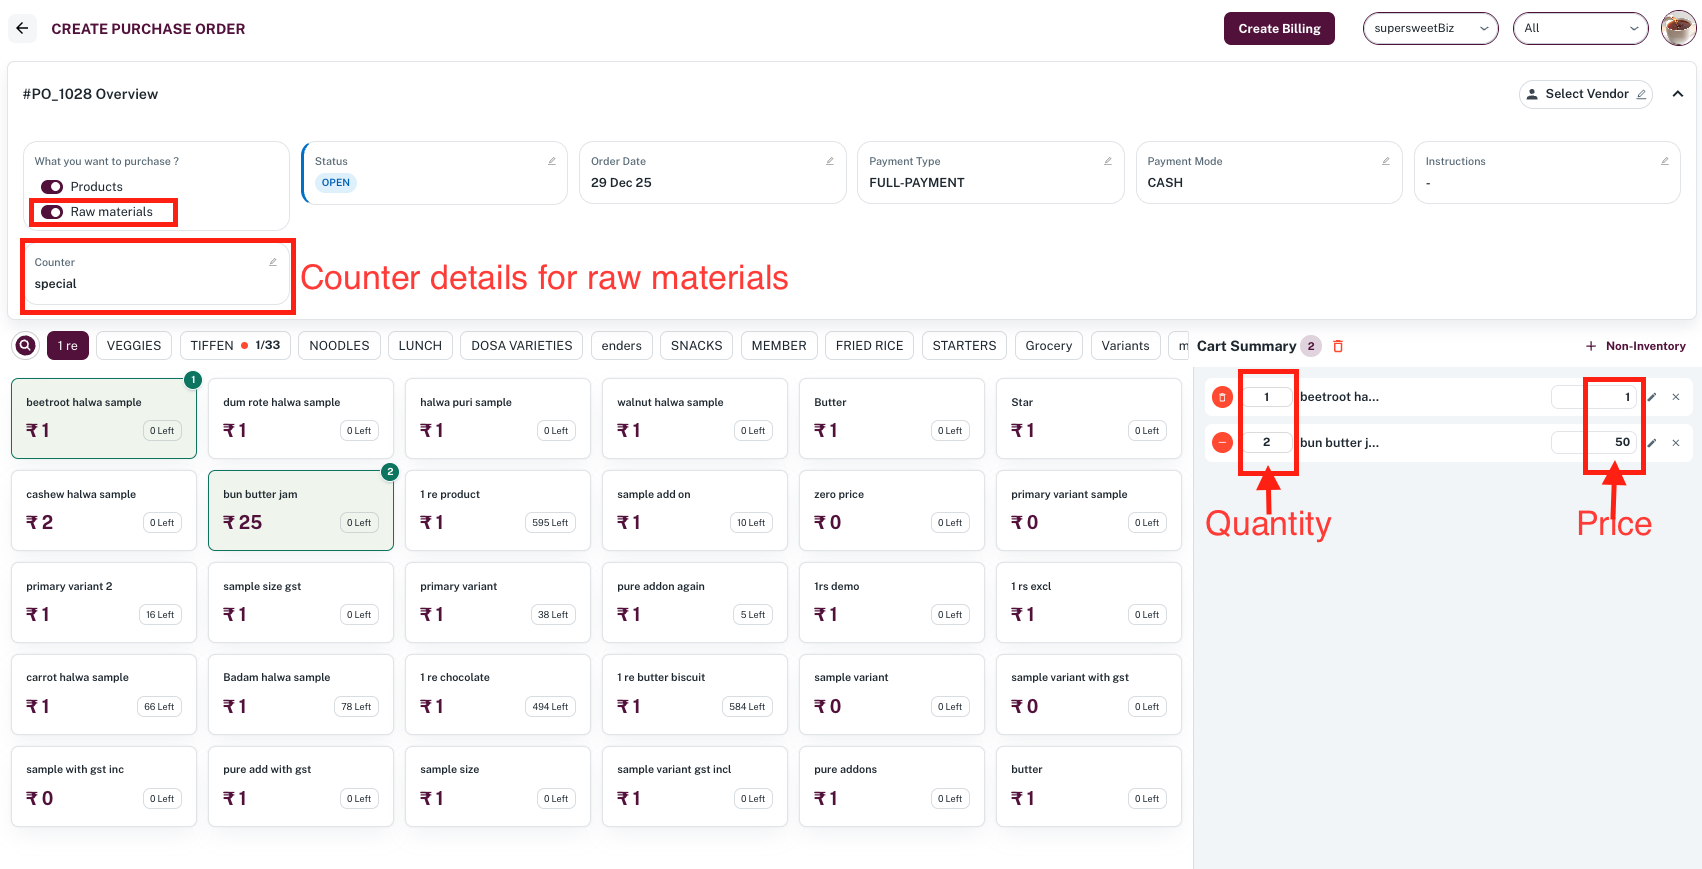
5.1 Add existing products / raw materials
-
Search and select from available products and/or raw materials.
-
For each item, enter:
- Quantity
- Purchase price
noteIf you are creating a PO for raw materials, you can also select the Counter name (kitchen/store) where the stock should be received.
- Enter GST % and choose whether it is Inclusive or Exclusive for each item.
- Select Auto Add (when the status is not Open) to automatically add stock to the respective product when the purchase order is created. Click Save button.
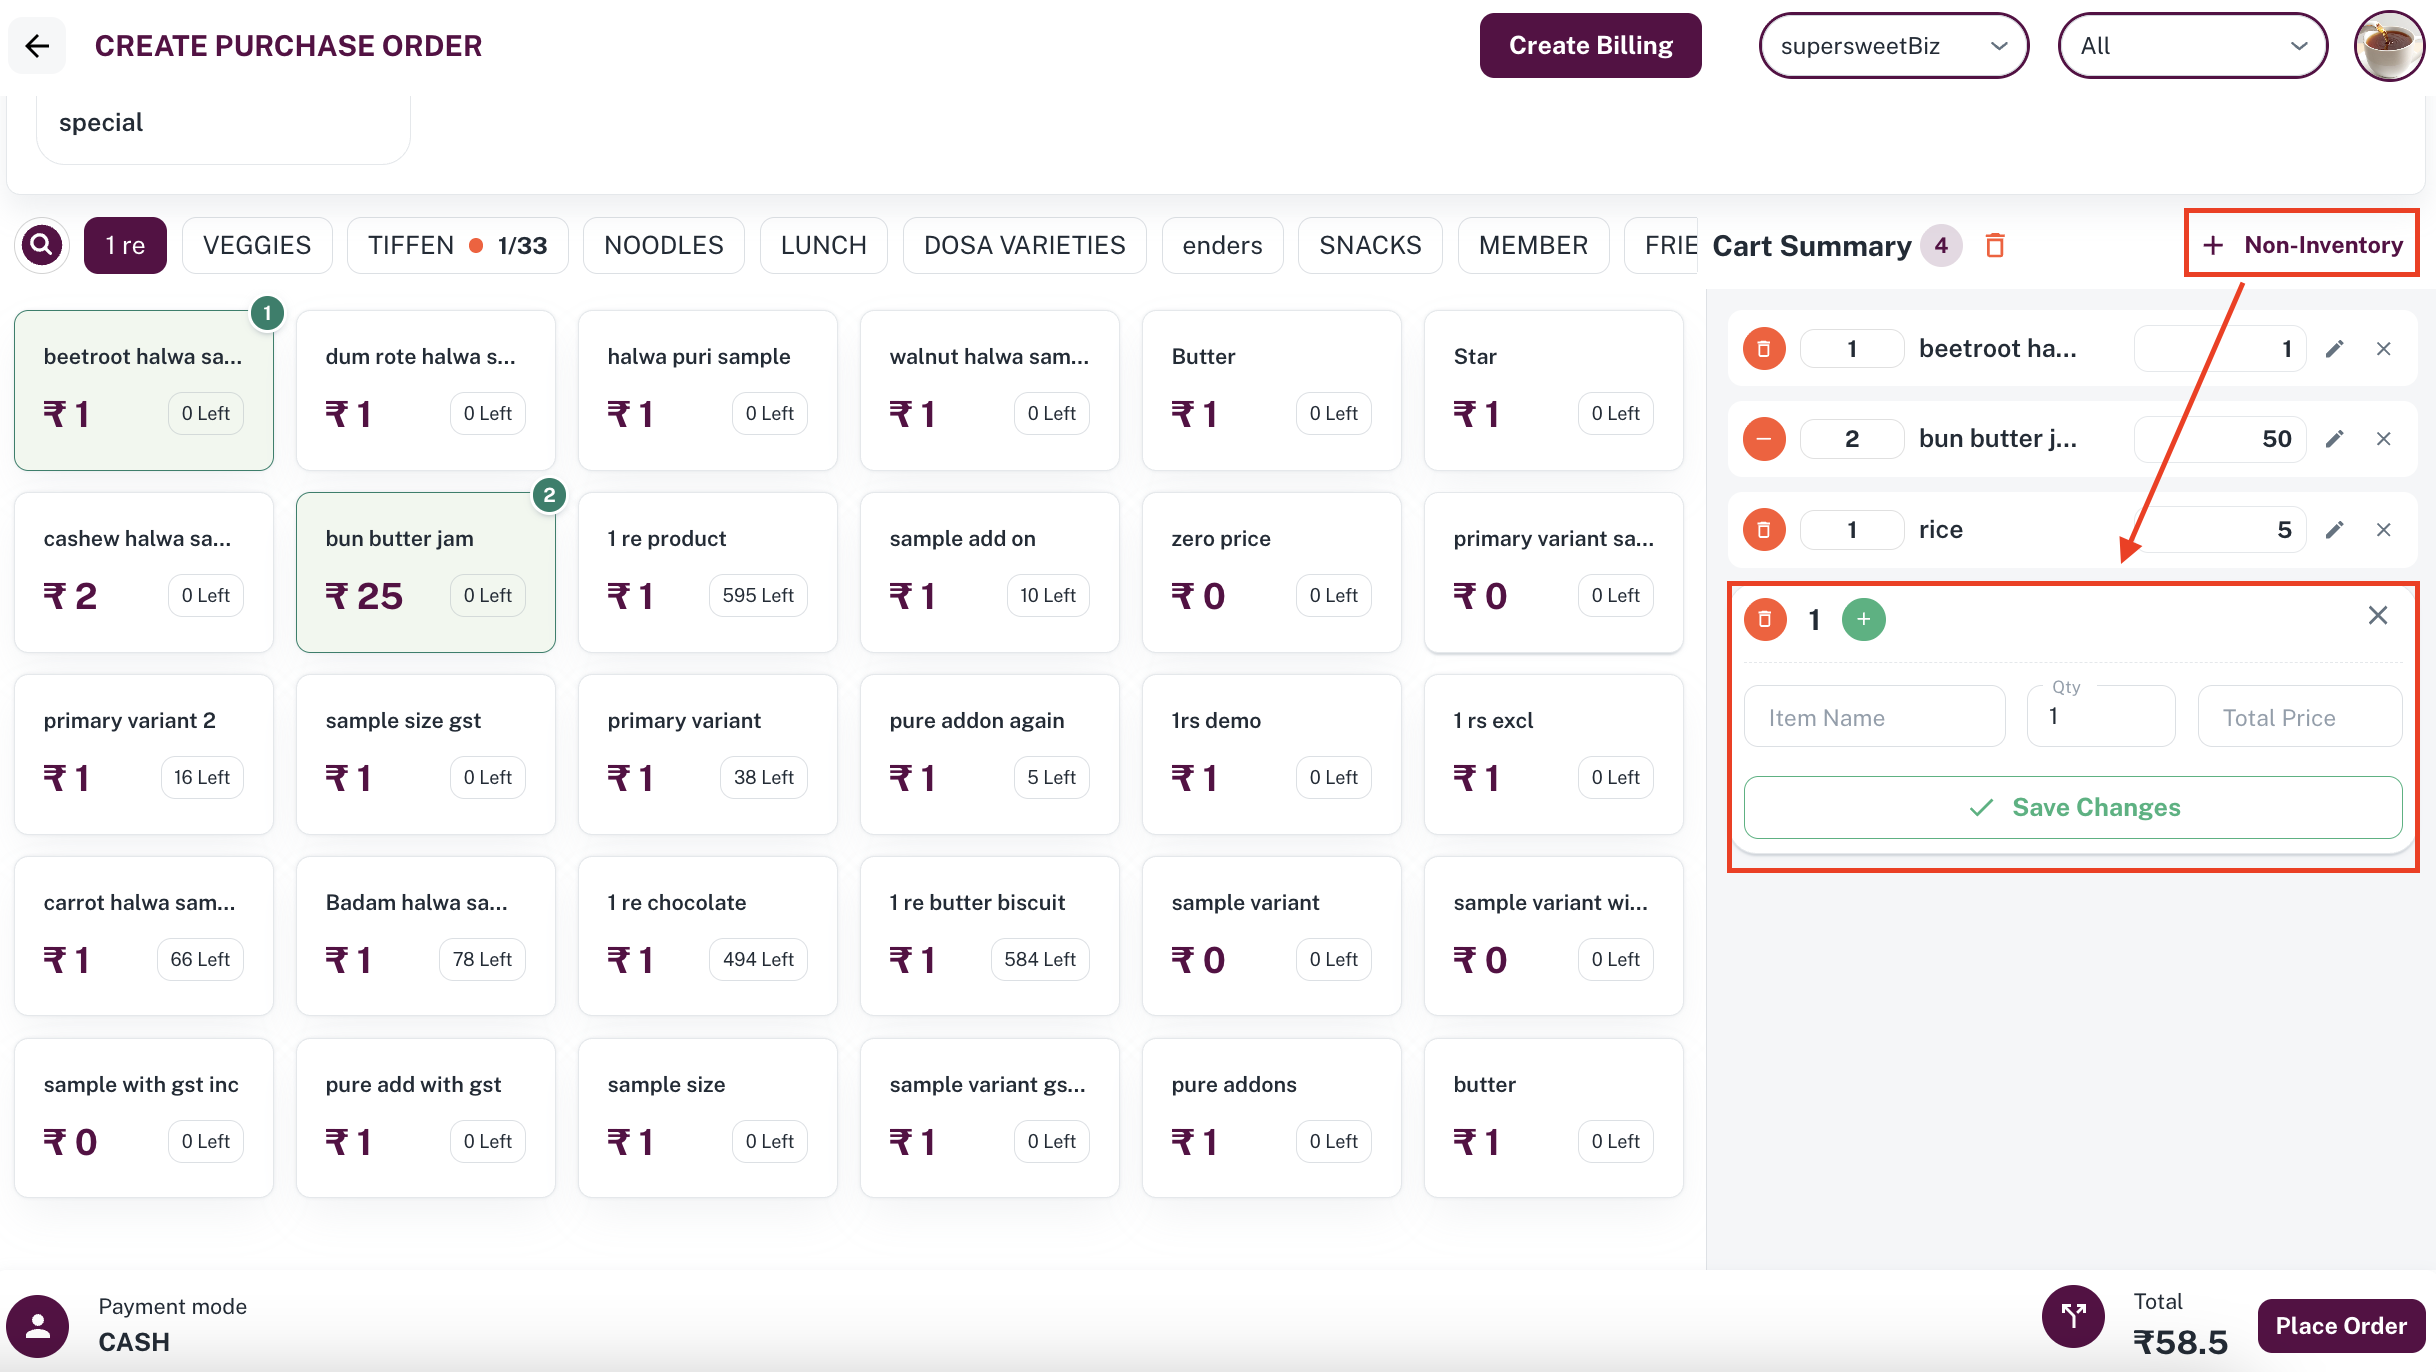
5.2 Add custom materials (optional)
If the required material is not already created:
-
Click Non-inventory.
-
Enter:
-
Item name
-
Quantity
-
Total price and click Save Changes.
-
applicable GST rate and GST type (Inclusive / Exclusive) can be selected by clicking the edit icon corresponding to Non-inventory product.
noteCustom materials will be added only to this PO.
-
Step 6: Configure delivery charges and discount
-
Delivery charges
- In the Delivery charges section, enter the delivery or transport charge amount.
-
Discount
- In the Discount section, enter the discount value.
The delivery charges and discount is applied at the order level.
Step 7: Save the purchase order
- Review all details: vendor, item list, GST type, delivery charges, discount, notes, order date, and payment information.
- Click Submit.
The purchase order is now created with the selected status. It can be viewed, edited or sent to the vendor.